![]() Test LOD0
Test LOD0
![]()
![]()
![]()
![]()
![]()
![]()
![]()
![]()
![]()
|
|
|
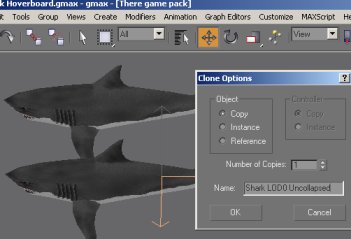
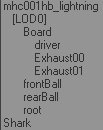
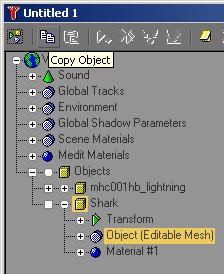
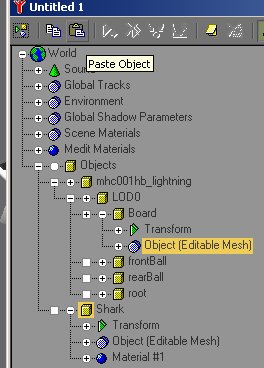
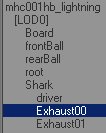
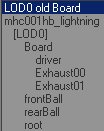
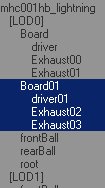
Also unhide the root object mhc001hb_lightning. In the Select By Name dialog, you should see the following hierarchy of objects. Ideally, we will now proceed to 'paste' the shark mesh over the Board mesh. But I am not able to obtain a cloned shark that retains its orientation, translation and scale using this mechanism. I tried copying the transformation in the Track View. I tried resetting pivot transformation of the shark first. I tried linking Shark to LOD0 first. None of these worked. I think next I time would link the new shark cylinder object to LOD0, as soon as I create it, before performing any transformation on it. This way, it will have the right transformation when we copy it onto the original board object. I will actually use a different method to replace Board with Shark in the next paragraph. But I will first show you how the 'ideal' copy/paste works. Open the track view and select the first Object item under Shark. Click on the clipboard icon to copy it. Next select the first Object item under Board. You would click on the paste icon to replace this with our shark model. The Past dialog comes up and you would check the box named "Copy". If you actually pasted onto Board, it is time to undo it.
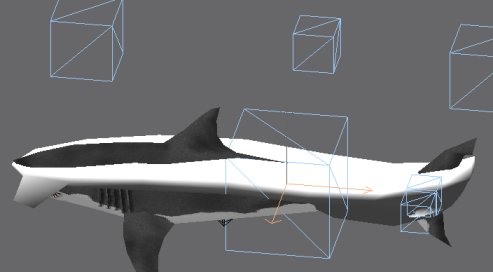
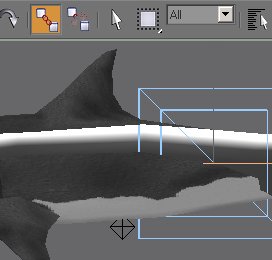
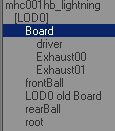
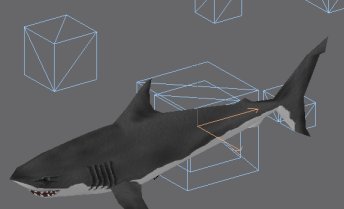
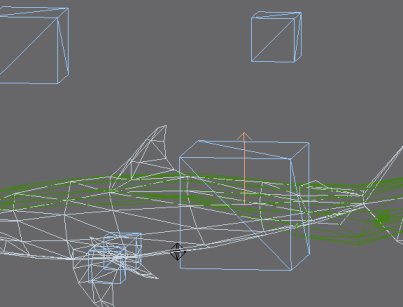
Click on Select And Link. Drag the fin of the shark and release mouse button over the diamond object representing the LOD0 box. The diamond should flash to indicate that you have just linked the Shark as a child node to the parent LOD0 object. Link the three helper objects originally under Board to Shark. After you are done, the Select By Name dialog should show you the hierarchy shown above. Select the Board object and rename it to "LOD0 old board". Select Shark and rename it 'Board'. You can now unlink "LOD0 old board" by clicking on the Unlink Selection button. This object should now appear as a sibling object of mhc001hb_lightning in the Select By Name dialog. You can now proceed to hide this object as well.
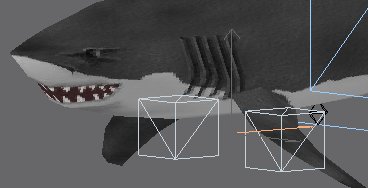
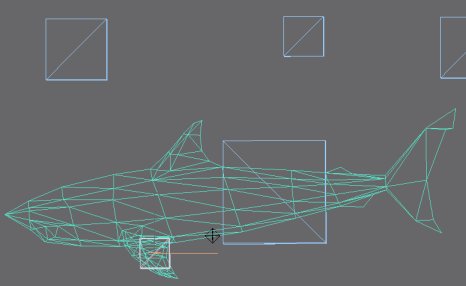
Move the two exhaust helper objects forward beneath each pectoral fin. You can use Select By Name to help you select these two objects. The exhaust boxes are the only helper objects There allows you to move. You cannot change other helper objects such as "driver", "frontball" and "rearball".
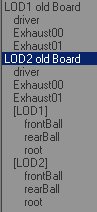
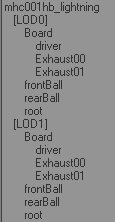
We can already export this gmax file to .model and test the shark in There Previewer. But we also want to test it in-world. As I mentioned earlier, when used in-world, There switches between the 3 LODs as you use your hoverboard. We need to have all three levels-of-detail for correct testing in-world. By trying our shark in-world, we can discover potential problems. We need to find all problems early, before we start to reduce polygons and vertices for LOD1 and LOD2. Use the technique described above to copy the shark board onto the other two LODs. First rename the "board" object of LOD1 and LOD2 to a different name. Unlink these boards together with their driver and exhaust objects. Select the LOD0 Board and its helper objects. Use the Edit | Clone menu item to clone the LOD0 board hierarchy without modifying its transformation. Name the new clones Board01 and Board02. Link Board01 to LOD1 and rename it and its helper objects to the right name. Do the same to Board02. And finally, hide everything and unhide just the mhc001hb_lightning hierarchy (including the 3 LODs). Use File | Export to export the scene to There model format. Save it as "Shark Model.model".
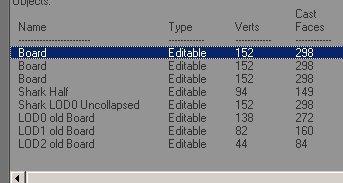
Use File | Summary Info to get a brief summary of objects in this file. Keep in mind that these show you the viewport vertex count, not UV vertex count which There uses. Notice that gmax correctly lists the texture file name in this dialog box.
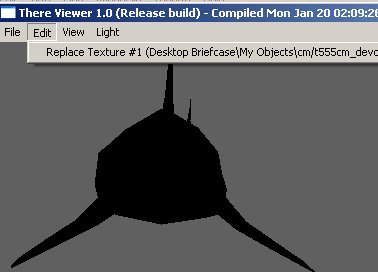
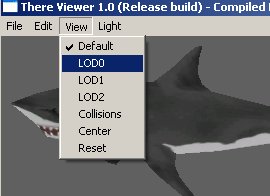
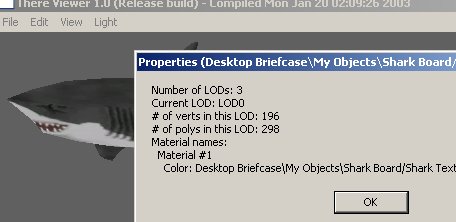
Open the model file in There Previewer. If previewer crashes, check that the shortcut you are using has the right working directory. You can also launch Previewer.exe from its directory in Windows Explorer. For some reason, sometimes the There gmax exporter doesn't generate a model with the right texture file name. The previewer can't load our texture automatically. Fortunately, this doesn't cause problems for your builder submission. When you submit your builder job, There simply uses the jpeg file you submit as the texture. Use Edit | Replace Texture to find the texture jpeg file. Remember that before we created the UVW map, we had 152 vertices in the viewport in gmax? Let's check how many UV vertices we have created by editing the UV map. First use Edit | LOD0 to select the LOD0 model. You will find that we used 196 vertices and 298 polygons for this model in File | Properties. This is good. We have not exceeded the constraints. Check that the other two levels of details are also visible. We will reduce vertex and polygon counts in LOD1 and LOD2 later.
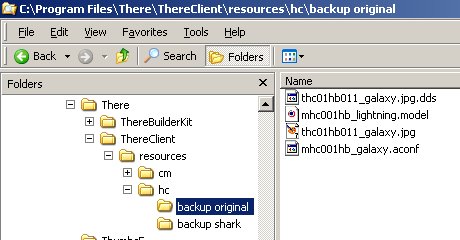
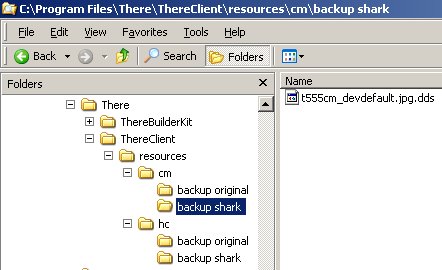
We can now test our model in-world. Be advised that we will be replacing local There Client files on your hard disk. You may potentially render your There program unusable, if you mess up these files badly. If you are uncomfortable working on them, you can skip this part of the tutorial. I'll assume that you have the popular galaxy board. First make copies of the four files illustrated above (dds, model, jpg and aconf) and save them into a backup directory.. I think There can regenerate the dds from jpg, but it doesn't hurt to be cautious. Then copy your model, jpeg and dds file into another newly created directory. The dds file is generated by previewer automatically, when you tested your model in the Previewer. Rename your files to match the original filenames. Copy the aconf file to your directory. In theory, your model file should already contain the name of your texture file. But I can't get There Exporter in gmax to create model files with right texture names. The texture filename always shows up as t555cm_devdefault.jpg.dds. In theory, you can modify the aconf file to point it to your texture file. That didn't work for me either. If it works for you, please let me know. I ended up replacing the cm/t555cm_devdefault.jpg.dds file with our texture file.
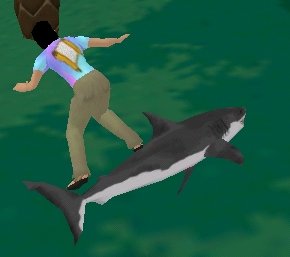
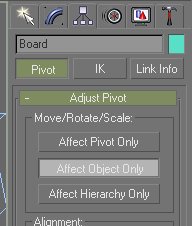
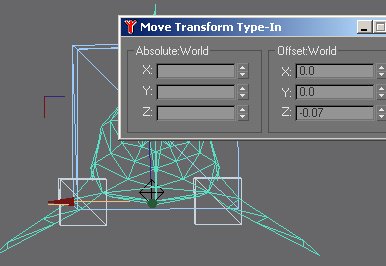
Now log into to There and try your hoverboard. We immediately notice that the back of the shark isn't really flush with the surface of original board. We will need to go back to gmax to fix this problem. Unhide LOD0 board and the original board. Unhide their helper objects as well. In the hierarchy pane, click Affect Object only. This allows us to rotate the board without rotating its children helper objects. Select the shark board and use the rotation dialog to rotate the shark around the x axis. Change it from -90 degrees to -85. Now the exhaust helper objects are positioned too high. Select these two objects by name, and lower them by an offset of -0.05 in the z axis. Repeat this procedure for LOD1 and LOD2. Actually, you only need to do this for LOD1, as we will most likely replace LOD2 with LOD1, once we are done reducing LOD1 polygons. If the contrails come out from weird places that you do not expect, then most likely you forgot to reset the pivot point of the Board object to (0,0,0). You can also notice the effect of bad pivot points, if you look closely when your avatar first jumps onto the hoverboard. If the pivot point is too high, your avatar will initially stand on air (apparently the Board pivot point is used for this animation). After a second or two, the camera zooms out, and the avatar stands on board correctly (apparently the Root is used here). After you are done having fun riding the shark, you can come back to reality and toil on more drudgery. We will attempt to reduce vertex and polygon counts in the next chapter. |