![]() Create Texture Map
Create Texture Map
![]()
![]()
![]()
![]()
![]()
![]()
![]()
![]()
![]()
|
|
|
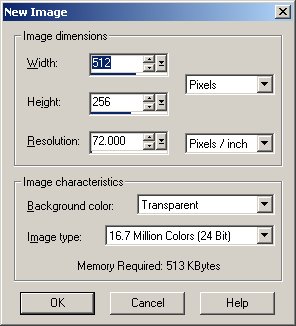
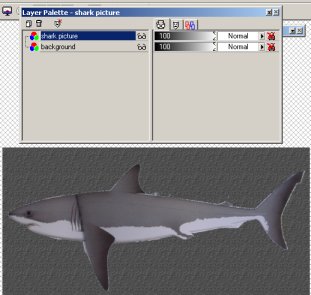
First prepare a texture file. I use Paint Shop Pro to create a 512 by 256 .psp file, instead of a JPEG file. The PSP file allows me to save different layers. The number of pixels for width and height must be expressed in power of 2, as dictated by There. I recommend that you paint your background with some basic texture, and add a layer with a side picture of a shark, for reference. Lets call this file Shark_Texture_512_256.psp. Also save a copy of this file as a .jpeg file, so we can use it in gmax.
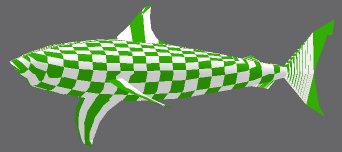
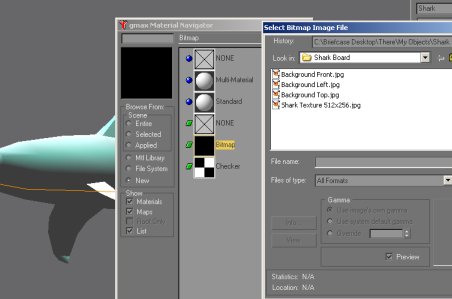
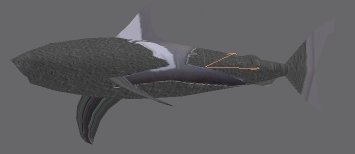
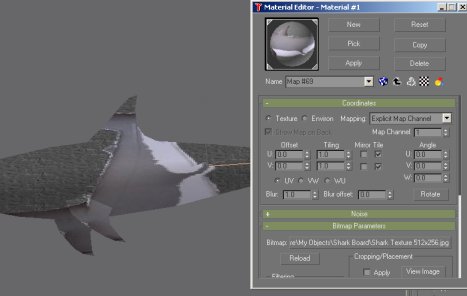
We have no more use for the checker texture we created earlier. You can remove all materials from the material editor now. We will then proceed to create a texture based on the 512x256 image file. First select the shark in the viewport. In the Material Navigator, create a new bitmap from the image file. Apply it to the shark. You will notice that the texture is applied to the shark in wrong orientation. There is no surprise here. If you compare our image to the original hoverboard skin, you will realize that we have drawn our shark in horizontal layout, while the original hoverboard was drawn vertically.
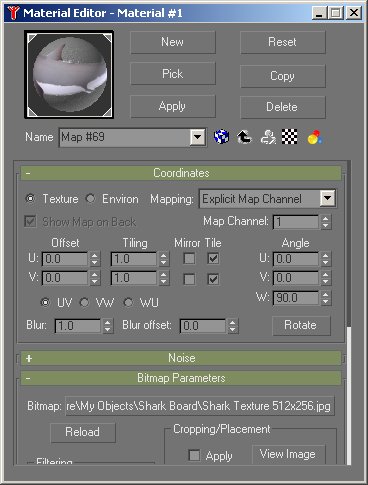
Fortunately, this is not the end of the world. You can rotate the texture map in gmax to correct this problem. I would rather leave the shark picture in horizontal layout, as it is more natural to a human. It makes image editing much easier. Just go to the material editor, and edit the bitmap configuration. Rotate the image by W by 90 degrees. Notice how the image seems to be upside down. We'll fix this when we add a UVW Map modifier in the next step.
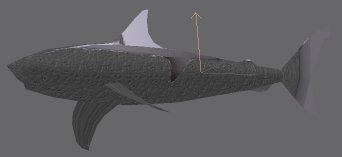
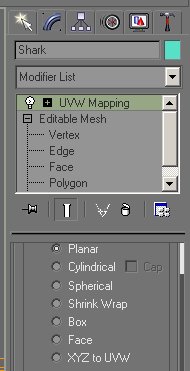
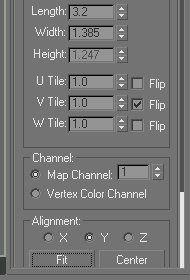
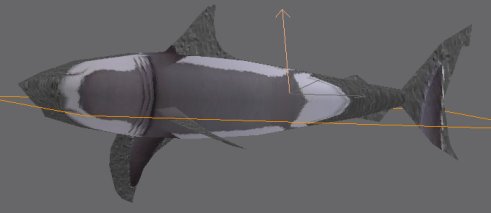
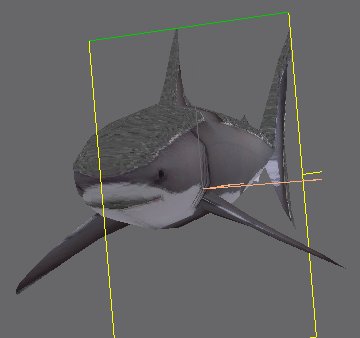
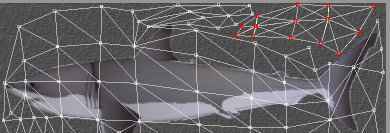
Since we have taken care to create the shark, such that it is perfectly symmetrical, we can Planar Map the bitmap to the shark, from the side. This allows us to draw a single side view of the shark, and map it to both left and right side of the body. This saves us time, and it maximizes the usage of the bitmap. While the There Dev document doesn't specify a constraint for bitmap size, I've heard that 512 is the maximum for both width and height. And let's not put unnecessary load on poor There servers, by asking it to load two sides of shark painted in a 512 by 512 image file, unless you want to risk having your builder submission rejected by There. Add a UVW Map modifier to the modifier stack. Choose Planar map, and click Flip on V to flip the bitmap. Also change Alignment to Y and click on Fit to fix the scale of the bitmap.
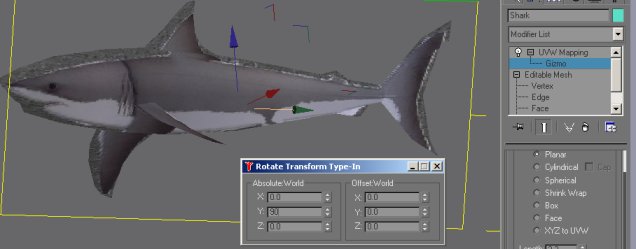
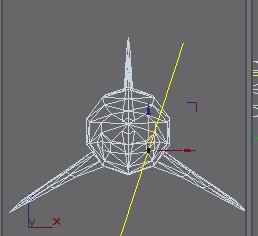
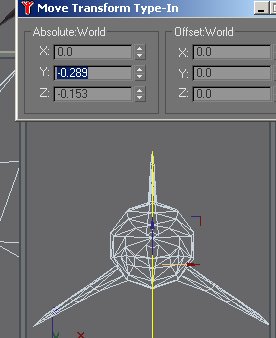
Click on the UVW Mapping modifier to show the Gizmo object under it. Select this object and click on Select and Rotate. Right click on this button to bring up the Rotate Transform Type-In. Enter -90 for Y to rotate the image. The image is now correctly mapped to the shark. Ah, but wait a minute. In the front viewport, we can clearly see that the gizmo isn't yet perfectly lined up. This is because we rotated the cylinder initially, when we created the body. We need to further rotate the gizmo around Y for another -18 degrees. Then, we move the gizmo to x=0, to center it. Now we have a perfect gizmo position and alignment.
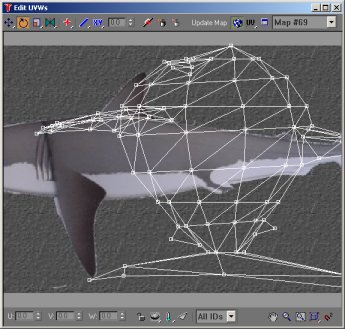
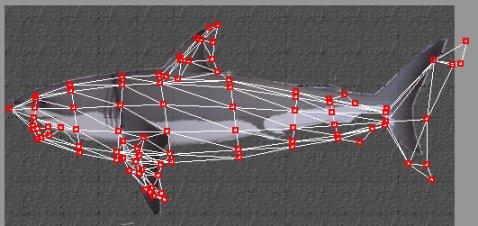
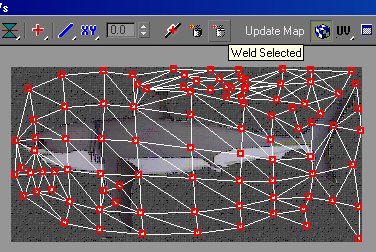
Add an Unwrap UVW Map modifier on top of the UVW Map modifier. Hit 'Edit' in the Parameters rollout for Unwrap UVW Map. For some reason, the UVW Editor doesn't know about the rotation of the bitmap we specified in the material editor. This is unfortunate. You need to go back to the material editor, and reset the rotation by W back to 0. We have already fitted the bitmap in UVW Map modifier, so resetting the W rotation is fine. Go to UVW Editor again, and rotate all vertices in the UV map counterclockwise for 90 degrees, to match the bitmap. You may need to zoom out first, so that you can select all vertices. After we add the UVW Unwrap modifier, you do not want to go back and change vertices and polygons in your viewport. Some minor operations such as moving vertices slightly will cause no harm. But these changes will not cause gmax to readjust the UV map. Other operations may cause real trouble for the UVW map.
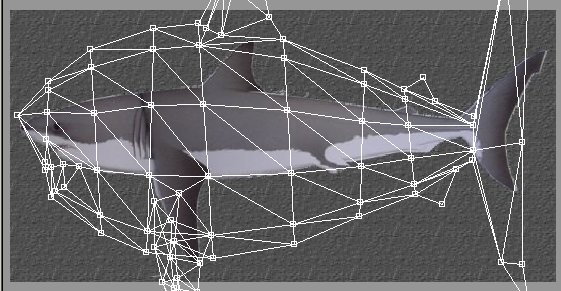
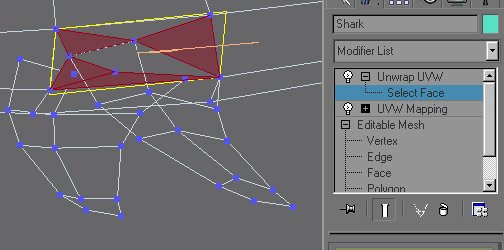
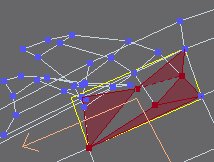
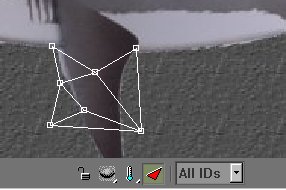
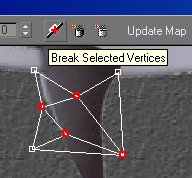
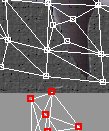
We are going to detach the pectoral fins now. In the UV map, the pectoral fin overlaps the main body. Thus you cannot easily distinguish its vertices from body vertices. Select the faces surrounding the base of the fin in the viewport, by using the Select Face SubObject of Unwrap UVW modifier. Also select the other 4 faces on the other side of the shark. In the UVW Editor, you can now hide all polygons/vertices, except those belonging to the faces you have selected in the viewport. Select the 4 vertices that form the base of the fin, and hit Break Selected Vertices to break up each UV vertex into multiple UV vertices, so that we can move polygons away.
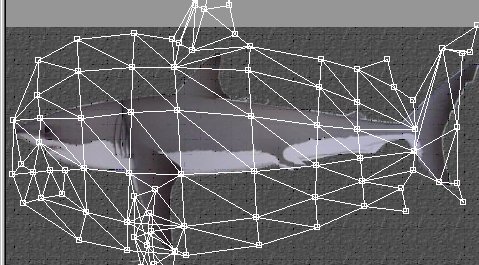
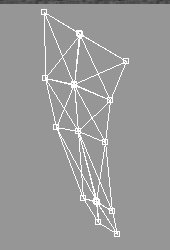
In the viewport, select all faces of the fin in both sides of the shark. In the UVW Editor, filter by selection, and move all fin polygons out. After some scaling, rotation, translation and mirror operations, we fit the pectoral fin in the upper right hand corner. Again, remember to select vertices using rectangle selection box, so that you select all vertices that appear on the same location in the UV map.
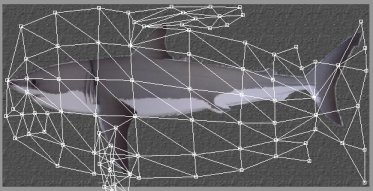
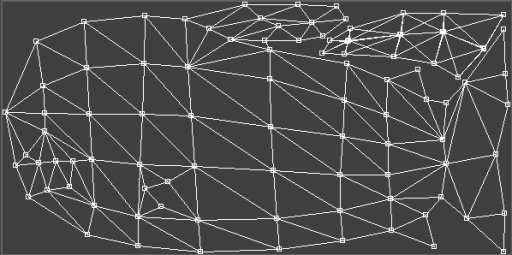
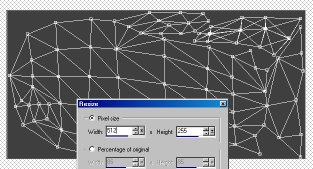
After a few more final adjustment of UV vertices, we now have the final UV map frame. Before we can paint the actual shark, however, we need to produce a 512x256 mesh frame image, so that we can use it as background in PSP, to help us paint an accurate image of shark. To do this, take a screenshot of the UVW Editor by hitting Alt-Print-Screen. Then paste the clipboard content as file into PSP. Crop the image so that only the bounding rectangle and its contents remain. Then resize this image to 512x256. I am going to call this file Shark_Frame_512_256.jpg Well, folks, we are now ready to Paint our shark... |