![]() Create Background
Create Background
![]()
![]()
![]()
![]()
![]()
![]()
![]()
![]()
![]()
|
|
|
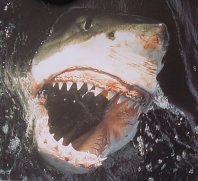
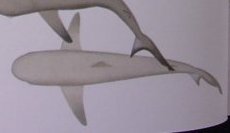
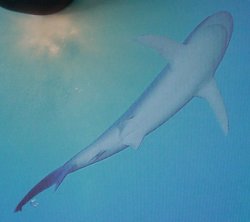
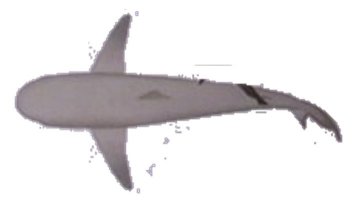
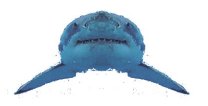
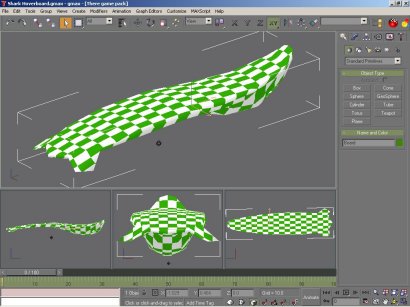
The best way to create the initial model of our shark is to follow techniques described in the gmax tutorial: Model an Airplane. We will project 3 orthographic pictures of the shark (left, top and front) onto their corresponding gmax viewports. We can then create a cylinder object as the initial shark body. After that, we move individual vertices of the cylinder to match contour of the shark as depicted in the 3 orthographic background images. But before we can do that, we need to gather some pictures of sharks. I took some pictures of the great white shark from a book I pulled from my bookshelf. Then I transferred the images from my digital camera to my computer, selected pictures that depict the shark from side, front and top, cut off parts I do not want in Paint Shop Prod, and resized all of them to approximately the same size.
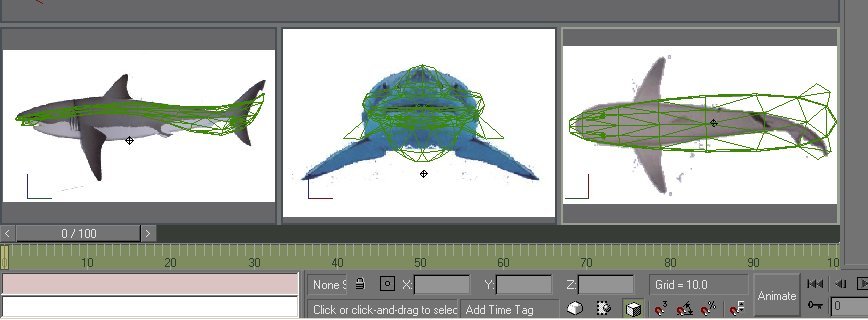
Select a side image, a top image and a front image. Paste them into Paint Shop Pro (PSP). If you are not too lazy, you may want to save them as .psp files, instead of jpeg files. This allows you to add layers to the images. You will, however, need to explicitly re-save them as .jpeg for gmax, each time you modify them in PSP. Now we need to adjust these three pseudo orthographical images, so that they are really orthographical. You may need to rotate the pictures a bit, skew part of it, etc. For the front shot, I cut the shark in half, and used one side of to produce a mirror image for the other side. You can remove most of the background using the magic wand. Small patches of background that refuse to go away can be removed using the freehand selection tool. Finally, scale all three pictures so that the shark has the same dimensions in all three images.
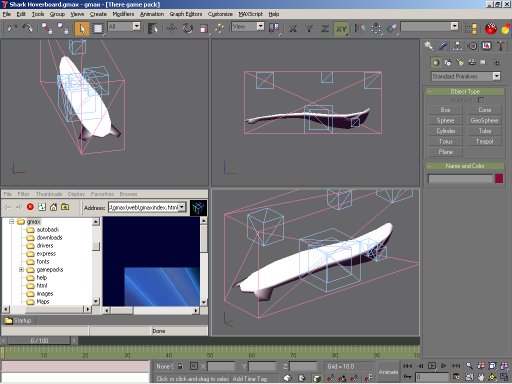
Take the m200hc_lightning01.gmax hoverboard file and rename it to "Shark Hoverboard .gmax". It is easier to start with the original gmax file from There, since we need to preserve all helper objects and linkage relationship among them. We will talk about these constraints later. Using the original file as a template also allows us to check the size and orientation of our shark model against the original hoverboard. Use the shortcut There dev kit created to launch gmax with There gamepack plug-in. Open the shark gmax file. You may get an error message saying that gmax cannot locate the texture file. This is ok. You have no use for the original hoverboard texture. Of course, you can copy the original texture file over to your working directory to make gmax happy, if you are easily terrorized by error messages. As for me, I just delete the bitmap material from the material editor. First make sure that toggle buttons such as 2D snap and angle snap in the lower-right hand corner are 'off'. Otherwise you may experience inexplicable user-interface behavior (assuming that you are new to gmax).
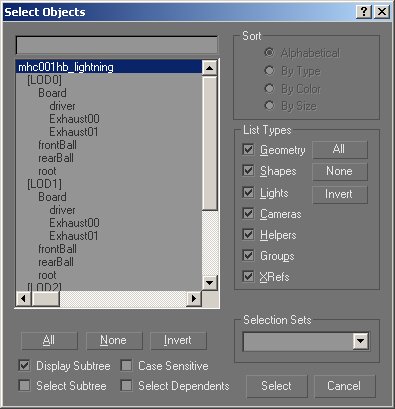
Familiarize yourself with the hoverboard model. Right now, you are actually seeing three hoverboard models at different levels-of-detail (LOD). They happen to occupy the same place, so it is a bit hard to tell them apart. Click on the 'Select Object' button, and select the hoverboard in the lower-right viewport. Click and hold the 'Arc Rotate' button until the flyout appears. I usually select the 'Arc Rotate SubObject' option. I think it is the most general and useful mode. Now you can rotate the hoverboard to see all its sides. Use the Min/Max toggle to expand the lower-right viewport to occupy the entire window. Take care not to translate or rotate the hoverboard by mistake, by (unintentionally) clicking on the Select And Move button or the Select And Rotate button. The There Dev Guide states that we need to maintain the link hierarchy of nodes. What does that mean? By nodes, I think they mean gmax 'objects'. A gmax object can be a helper object, an editable mesh, a standard primitive object (box, cylinder, etc). You can create many objects in a scene (a gmax model file). You can additionally define linkage relationship among them. Click on the Select By Name button to see all objects in this scene. Check the Display Subtree to show hierarchy of objects.
For instance, in the hoverboard model, there is a top-level Dummy object called mhc001hb_lightning. Under it you will find 3 level-of-detail objects. Each level contains its own Board Editable Mesh and additional helper objects for the driver and the two jet holes. LOD0 contains the most detailed Board object. LOD2 contains the least-detailed board. Your job as a builder is to replace the 3 board objects with your own editable mesh. Use the right-click menu to hide/unhide objects. The hide/unhide menu changes depending on whether or not you have selected an object. If you left-click on an empty space to deselect object, and use right-click menu to Hide Unselected, everything in the viewport will disappear. The Select By Name dialog will show an empty object list.
You can use the Display panel to unhide objects by name. Click on Unhide By Name, and select the Board object under LOD0. The Select By Name dialog now show just those objects under LOD0. You will now only see those subset of objects in the viewports. Use the Hide By Category rollout in the Display panel to hide the Helper object. Select the LOD0, and use Link Display rollout in Display panel to check Link Replaces Object, to reduce the annoying red LOD0 box to a diamond shaped object. You are now left with a hoverboard. You will find it helpful to occasionally display the helper objects, when you are shaping your shark editable mesh, so you can correctly place it with respect to the Driver and Exhaust holes.
Now that we have the background images all setup, we can start to model the hoverboard.
|